Wednesday, August 12, 2026

Authentic Cacio e Pepe (With Easy American Grocery Substitutions)

Prep time: 10 minutes | Cook time: 10 minutes | Servings: 2

Cacio e Pepe, literally "Cheese and Pepper", is one of Rome's most iconic pasta dishes. While the ingredient list is deceptively simple, the magic relies entirely on technique. By creating a starchy cheese paste off the heat, you achieve a velvety, restaurant-quality sauce with zero butter, oil, or cream.

Ingredients

| Ingredient | Weight / Amount | Notes & Substitutions |

|---|---|---|

| Pasta | 250g (~8.8 oz) dry | Bucatini, Tonnarelli, or Spaghetti. |

| Cheese | 250g (~2.5 cups, finely grated) | Traditional: 100% Pecorino Romano D.O.P.

US Grocery Swap: 50% Domestic Romano + 50% Parmesan. |

| Black Pepper | 2.5g to 3g (~1 to 1.5 tsp) | Freshly cracked or coarse pre-ground black pepper. |

| Salt | To taste | For the pasta cooking water (use less than usual). |

The Secret Ratio: Equal Parts Cheese & Pasta

For the absolute rich, silky coating you see in traditional Roman trattorias, use a 1:1 ratio of pasta to finely grated cheese by weight (250g pasta to 250g cheese for two generous portions).

The American Grocery Store Swap

If you can’t source imported Italian Pecorino Romano D.O.P., grab standard US grocery store wedges of Romano and Parmesan (like Private Selection or BelGioioso):

 * Domestic Romano (Cow’s Milk): Delivers that sharp, salty, aggressive bite.

 * Parmesan (Aged 10+ Months): Adds rich, nutty depth and helps the sauce melt smoothly.

 * The Ratio: Blend them 50/50. Grate both on the finest setting of a microplane so the cheese dissolves instantly into the starchy water without clumping.

Step-by-Step Instructions

1. Toast the Black Pepper

Add your ground black pepper to a dry skillet over medium-low heat. Toss and stir continuously for 20 to 30 seconds until warm and fragrant. Immediately pour in a small splash of hot water to cool the pan down and stop the pepper from burning. Turn off the heat.

2. Boil the Pasta (Low Water = High Starch)

Bring a wide, shallow pot of water to a boil. Use about half the water you normally would.

 * Using less water concentrates the starch released by the pasta, creating the "liquid gold" needed to emulsify the sauce.

 * Season the water lightly with salt.

 * Drop in 250g of dry Bucatini and boil until it is about 2 minutes shy of al dente (it will finish cooking in the skillet).

3. Build the Cheese Paste

While the pasta boils, place your 250g of finely grated cheese blend into a mixing bowl. Add a small ladle of the hot, cloudy pasta water. Whisk vigorously with a fork until a thick, completely smooth paste forms (similar to the texture of warm toothpaste).

4. Combine in the Skillet

Turn the heat under your pepper skillet to medium. Transfer the undercooked Bucatini directly into the pan using tongs. Add half a ladle of starchy pasta water and toss for 1 to 2 minutes so the noodles finish cooking and absorb the pepper flavor.

5. The Off-Heat Emulsion

> The Golden Rule: Cheese seizes and turns rubbery above 70°C (158°F). Pull the skillet completely off the active burner and let it cool for 30 seconds.

 * Pour the cheese paste directly over the warm pasta.

 * Immediately toss and stir rapidly. The starchy water and cheese fats will fuse into a glossy, velvety coating.

 * If it looks too thick, splash in a little extra pasta water; if it looks loose, keep tossing for 30 seconds as it cools and thickens up.

Pro Tips for the Best Results

 * Never Use Pre-Shredded Cheese: Pre-shredded bagged cheeses contain anti-caking agents (like cellulose) that prevent them from melting into a smooth emulsion. Always buy a solid wedge and grate it fresh on a microplane.

 * Toss Continuously: Agitation helps the starch and milk fats lock together into a cream without needing heavy fats or butter.


Saturday, June 6, 2026

Vanilla on vanilla fmf buttercream cake


 ​A Birthday Wish, Sweetened with FMF

​There is something inherently magical about baking for a birthday. This year, for my niece’s big day, I wanted to move beyond the convenience of store-bought mixes and create something truly special. The secret? Freshly milled flour (FMF). There is a depth of flavor and a delicate, wholesome quality in FMF that elevates a simple vanilla cake into a celebration-worthy masterpiece. It’s a labor of love, but seeing that first slice served makes every minute at the mill worth it.

​The Perfect FMF Vanilla Birthday Cake

​Ingredients

​For the Cake:

​433g FMF (Soft White Wheat, finely milled)

​400g Granulated sugar

​3 sticks Unsalted butter (room temperature)

​5 Large eggs total (3 whole eggs + 2 large egg whites)

​385g Buttermilk (room temperature)

​15g Pure vanilla extract

​12g Baking powder

​3g Baking soda

​6g Salt

​For the Vanilla Buttercream:

​3 sticks Unsalted butter (softened)

​650g Confectioners' sugar

​80ml Whole milk or heavy cream

​7g Pure vanilla extract

​1g Salt

​Instructions

​Mill & Prep: Preheat your oven to 350°F (177°C). Use your mill to produce 433g of fresh Soft White Wheat FMF. Grease your pans (two 8-inch/9-inch rounds or one 9x13 pan).

​Dry Ingredients: Whisk together the 433g FMF, baking powder, baking soda, and salt.

​Cream: Beat the 3 sticks of butter and 400g sugar until light and airy (about 3 minutes).

​Emulsify: Mix in the 3 whole eggs and 2 egg whites one by one, then the vanilla.

​Fold: With the mixer on low, gradually alternate adding the dry mix and the 385g buttermilk. Mix until just combined—be careful not to overwork the FMF!

​Bake: Pour into prepared pans. Bake for 25–30 minutes (up to 35 minutes for a 9x13). Test with a toothpick; it should come out clean. Cool completely.

​Frost: Whip the 3 sticks of butter and remaining frosting ingredients together until fluffy. Frost your cooled masterpiece.

Monday, April 27, 2026

The Perfect Cinnamon Swirl Sourdough: A Fresh Milled Flour (FMF) Guide

There is something transformative about the aroma of cinnamon and freshly milled wheat filling the kitchen. If you’ve ever struggled with "cinnamon tunnels" or a gummy interior when using 100% whole grains, this recipe is for you.

By using the Mockmill 200 to produce a fine FMF and leveraging the steam-trapping power of the AILITOR double cast iron loaf pan, we’ve created a loaf that is as beautiful as it is delicious.

Why Fresh Milled Flour (FMF)?

Using FMF (Fresh Milled Flour) means we are keeping the germ and bran intact. This results in a deeper, nuttier flavor that pairs perfectly with the warmth of cinnamon. However, FMF is thirsty and enzymatically active—meaning it ferments faster and requires a specific hydration touch.

The Recipe

- Ingredients (Weights in Grams)

--The Dough:

-500g Hard White Wheat (milled to FMF)

-375g Warm Water (~90°F)

-100g Active Sourdough Starter

-40g Honey

 -10g Fine Sea Salt


The Filling:

-60g Brown Sugar

-10g Ground Cinnamon

-10g Melted Butter

Instructions

1. The Mill and Autolyse

Set your Mockmill 200 to the finest setting. Milling your own flour right before mixing ensures maximum nutrient density and a superior "sweet" wheat flavor. Combine the FMF and warm water in a stand mixer and let rest for 45 minutes. This autolyse is essential for FMF to soften the bran and prevent a gritty texture.

2. Mixing and Bulk Fermentation

Add your starter, honey, and salt. Mix on low for 5–7 minutes until the dough is strong and elastic.

 - Perform 3 sets of North-South-East-West stretch and folds every 30 minutes.

 - Allow the dough to bulk ferment until it has risen about 30–50%. In a warm kitchen, this happens faster than you think! Watch the dough, not the clock.

3. Laminating the Swirl

Gently stretch the dough into a large rectangle. Brush with melted butter and sprinkle the cinnamon-sugar mix evenly. Roll the dough tightly into a log. Tight tension here is the secret to avoiding those large air gaps around the cinnamon layer.

4. The Cold Proof

Place your loaf in a proofing basket or lined pan, cover tightly, and refrigerate for 8–12 hours. This cold ferment develops that classic sourdough tang and makes the dough firm enough for clean scoring.

5. The Bake

Preheat your cast iron pan to 450°F.

- Score the loaf and use a parchment sling to drop it into the hot pan.

- Bake covered (clamshell style) for 20 minutes.

- Remove the top pan, drop the oven to 400°F, and bake for another 20–25 minutes.

- Target Temperature: For a sweet FMF loaf, aim for an internal temp of 200°F–205°F to ensure the center is fully set. Be sure the use a thermometer to check! 

 Baker’s Tips for Success

- Don't Pull Too Early: Because of the honey and sugar, the crust will darken quickly. If it looks "done" but the internal temp is still low, tent it with foil and keep baking!

 - Wait to Slice: As tempting as it is, let the loaf cool completely. The starches in FMF continue to set even after the loaf is out of the oven.

 - Support the Rise: Using a cast iron loaf pan provides the side-wall support that whole grain doughs often need to achieve that impressive height.


Thursday, October 23, 2025

​Freshly Milled Flour Pumpkin Chocolate Chip Cookies


​These cookies are soft, chewy, and packed with flavor. Using freshly milled soft white wheat will give you the most tender result, but hard white wheat will also work well.

​Yields: About 2 dozen cookies

Prep time: 20 minutes

Chill time: 1 hour

Bake time: 12-15 minutes

​Ingredients

​2 .5 cups (300g) freshly milled Soft White Wheat flour

​1 teaspoon baking soda

​1 teaspoon baking powder

​.5 teaspoons ground cinnamon

.5 teaspoon ground nutmeg

​.5 teaspoon ground ginger

​.25 teaspoon ground cloves

​.25 teaspoon salt

​.5 (113g) salted butter, softened to room temperature

​1 cup (200g) packed brown sugar

.5 cup (100g) granulated sugar

​1 cup (225g) pumpkin puree (canned, not pie filling)

​1 large egg

​2 teaspoons vanilla extract

​1.5 cups (255g) semi-sweet or dark chocolate chips

​Instructions

​Prepare the Flour: Mill your wheat berries to get a fine flour. Measure out 2.5 cups (300g).

​Combine Dry Ingredients: In a medium bowl, whisk together the freshly milled flour, baking soda, baking powder, salt, and all the spices (cinnamon, nutmeg, ginger, cloves). Set aside.

​Cream Butter and Sugars: In a large bowl using a stand mixer or a hand mixer, beat the softened butter, brown sugar, and granulated sugar together on medium speed until light and fluffy (about 2-3 minutes).

​Add Wet Ingredients: Beat in the pumpkin puree, egg, and vanilla extract until well combined. The mixture may look a little separated, which is normal.

​Combine Wet and Dry: With the mixer on low speed, gradually add the dry ingredient mixture to the wet ingredients. Mix until just combined. Be careful not to overmix.

​Fold in Chocolate Chips: Gently fold in the chocolate chips with a spatula.

​Chill the Dough (Crucial Step): The dough will be very soft. Cover the bowl with plastic wrap and chill in the refrigerator for at least 1 hour, or up to 3 days. Chilling prevents the cookies from spreading too much and deepens the flavor.

​Preheat and Prepare: When ready to bake, preheat your oven to 350 degrees f. Line two baking sheets with parchment paper.

​Scoop and Bake: Scoop rounded tablespoons of the chilled dough (about 1.5 tablespoons each) onto the prepared baking sheets, placing them about 2 inches apart.

​Bake: Bake for 12-15 minutes, or until the edges are set and lightly browned. The centers will still look soft.

​Cool: Let the cookies cool on the baking sheet for 5 minutes before transferring them to a wire rack to cool completely.

​Tips for Success with Freshly Milled Flour

​Flour Choice: Soft white wheat is ideal for a tender, cake-like cookie. Hard white wheat will also work, but the cookies might be slightly denser and chewier.  

​Moisture Content: Freshly milled flour is "thirstier" than store-bought flour. This recipe is balanced for that, but the chill time is essential to allow the flour to fully hydrate.

​Pumpkin Puree: For a chewier, less cakey cookie, you can blot the pumpkin puree before adding it. Simply spread it on a plate lined with a few paper towels and let it sit for a few minutes to absorb excess water.

​Enjoy your homemade cookies!

Monday, October 6, 2025

Crispy All-Flour Fried Okra with Freshly Milled Flour

Perfect for a pleasant early October evening here in Frisco, this recipe will give you a wonderfully light and crispy side dish for your Monday dinner.

 * Yields: 4-6 servings

 * Prep time: 15 minutes

 * Cook time: 15-20 minutes

Ingredients

For the Okra & Frying:

 * 1 lb fresh, young okra pods

 * 3-4 cups high-smoke-point oil (e.g., peanut, canola, or vegetable oil)

The Wet Batter:

 * 1 large egg

 * 2 tablespoons buttermilk (or whole milk)

The Dry Coating:

 * 1 ½ cups freshly milled soft white wheat flour

 * 2 teaspoons kosher salt, plus more for finishing

 * 1 teaspoon freshly ground black pepper

 * 1 teaspoon smoked paprika

 * ½ teaspoon garlic powder

 * ¼ teaspoon cayenne pepper (optional, for a little heat)

Equipment

 * Large, heavy-bottomed skillet or Dutch oven

 * Two shallow bowls or pie plates

 * Tongs or a spider strainer

 * Wire cooling rack set over a baking sheet

Instructions

 * Prepare the Okra: Wash the okra pods thoroughly. Pat them completely dry with paper towels or a clean kitchen towel—this is the most critical step to avoid a slimy texture. Trim off the stems and slice the pods into ½-inch thick rounds.

 * Set Up Your Dredging Station:

   * Wet Batter: In your first shallow bowl, whisk the egg and buttermilk together until smooth and uniform.

   * Dry Coating: In your second shallow bowl, combine the 1 ½ cups of freshly milled flour, 2 teaspoons of kosher salt, black pepper, smoked paprika, garlic powder, and cayenne pepper (if using). Whisk until all the seasonings are evenly distributed.

 * Heat the Oil: Pour the oil into your skillet or Dutch oven to a depth of about 2 inches. Heat it over medium-high heat until it reaches 365°F (185°C). If you don't have a thermometer, you'll know it's ready when a pinch of the flour mixture sizzles instantly and vigorously when dropped in.

 * Coat the Okra: Working in a few small batches, add a handful of okra slices to the Wet Batter and toss to coat them lightly. Use a fork to lift the okra out, allowing any excess egg mixture to drip off.

 * Dredge in Flour: Immediately transfer the wet okra to the Dry Coating bowl. Toss gently until every piece is thoroughly covered in the flour mixture.

 * Fry in Batches: Carefully place a single layer of the coated okra into the hot oil. Do not overcrowd the pan. Overcrowding will cause the oil temperature to drop, resulting in soggy, greasy okra. Fry for 3-5 minutes, turning the pieces occasionally, until they are a beautiful deep golden brown and crispy.

 * Drain and Season: Use tongs or a spider strainer to remove the fried okra from the oil. Let the excess oil drip off for a moment, then transfer the okra to the wire rack to drain. Immediately sprinkle with a little extra kosher salt while they are still hot.

 * Repeat: Bring the oil back up to temperature and repeat the process with the remaining okra until it is all fried. Serve immediately while hot and crispy.


Sunday, August 10, 2025

Fresh milled flour brownies

Hello from Frisco, Texas!

On a warm and lazy Sunday afternoon like today, there’s nothing better than the smell of something sweet baking in the oven. While it might be hot outside, these brownies are worth every second of oven time. They’re rich, fudgy, and made with a secret ingredient that takes them over the top: freshly milled soft white wheat flour.

If you’ve never baked with fresh flour, you’re in for a treat. It adds a subtle, nutty sweetness and an incredibly tender texture that you just can’t get from a store-bought bag. This recipe is simple, straightforward, and the perfect way to use that beautiful flour.


Let's get baking!

The Ultimate Freshly Milled Wheat Brownies

This recipe is designed to be quick, easy, and deliver a perfectly fudgy brownie with a classic, crackly top. We're using salted butter to make it even simpler—one less ingredient to measure!

 * Yields: One 8x8 inch pan (9-12 brownies)

 * Prep Time: 10 minutes

 * Bake Time: 20-25 minutes

Ingredients

 * 1/2 cup (113g) salted butter

 * 1 cup (200g) granulated sugar

 * 2 large eggs

 * 1 teaspoon vanilla extract

 * 1/2 cup (60g) unsweetened cocoa powder

 * 1/2 cup (65g) freshly milled soft white wheat flour*

 * 1/4 teaspoon baking soda

 * 1/2 cup (85g) chocolate chips (optional, but highly recommended!)

Note on Butter & Salt: This recipe is written for salted butter. If you are using unsalted butter, just add 1/4 teaspoon of fine sea salt along with your dry ingredients.

Instructions

 * Preheat and Prepare: Preheat your oven to 350°F (175°C). Grease an 8x8 inch baking pan or line it with parchment paper, leaving some overhang to easily lift the brownies out later. (You can use other pans- I used a mini muffin tin today!)

 * Melt Butter and Sugar: In a medium saucepan, melt the salted butter over low heat. Remove the pan from the heat and stir in the sugar. The mixture will look glossy and feel a bit grainy.

 * Add Eggs and Vanilla: Whisk in the eggs one at a time, mixing well after each until the batter is smooth and shiny. Stir in the vanilla extract.

 * Sift in Dry Ingredients: Place a fine-mesh sieve over your saucepan. Add the freshly milled flour, cocoa powder, and baking soda to the sieve and sift them into the wet ingredients. This prevents clumps and makes for a smoother batter.

 * Mix the Batter: Gently fold the dry ingredients into the wet until just combined. It’s important not to overmix! A few streaks of flour are okay. If using, fold in the chocolate chips now.

 * Rest the Batter (Optional Step): For the most tender brownie, cover the bowl and let the batter rest for 15-30 minutes. This allows the fresh flour to fully hydrate and absorb the liquid, improving the final texture.

 * Bake: Pour the batter into your prepared pan and spread it into an even layer. Bake for 20-25 minutes. The edges should look set, and a toothpick inserted into the center should come out with moist, fudgy crumbs attached (not wet batter). (If you use a muffin tin check it after 18 minutes with a toothpick).

 * Cool Completely: This is the hardest part! Let the brownies cool completely in the pan on a wire rack. Cooling ensures they set properly, giving you that dense, fudgy texture and allowing for clean, beautiful slices.

A Quick Tip on Flour: For best results, I recommend weighing your freshly milled flour with a kitchen scale. If you don't have one, just be sure to spoon the flour into your measuring cup and level it off rather than scooping directly from the container.

I hope this recipe brings a little homemade joy to your kitchen. They are absolutely perfect on their own or served slightly warm with a scoop of Blue Bell ice cream.

Happy Baking!

Jill

Monday, June 30, 2025

Freshly milled flour cinnamon rolls

✨ Soft Sourdough Cinnamon Rolls with Brown Sugar & Vanilla Cream Glaze

These sourdough cinnamon rolls are soft, sticky, and packed with rich brown sugar-cinnamon flavor. Built on a naturally leavened, finely milled flour dough, they’re enriched with egg and butter for a tender crumb — and topped with a lush vanilla glaze made from heavy cream.

๐Ÿ’ก Why You'll Love This Recipe

  • No commercial yeast — 100% sourdough

  • Deeper flavor profile — all brown sugar, no white sugar

  • Overnight friendly — make-ahead and bake fresh

  • Rich vanilla glaze — no milk required


๐Ÿ•’ Timeline Overview

Step Time
Day 1 (Evening) Mix, bulk ferment, fridge
Day 2 (Morning) Shape, proof, bake, glaze

๐Ÿงพ Ingredients

Dough

  • 500g finely milled all-purpose flour (FMF)

  • 100g active sourdough starter (100% hydration)

  • 200g water

  • 50g heavy cream or half-and-half (or more water)

  • 50g brown sugar (light or dark)

  • 1 large egg

  • 8g salt

  • 60g unsalted butter (softened)

Filling

  • 100g brown sugar (light or dark)

  • 2 tbsp ground cinnamon

  • 60g unsalted butter (very soft or melted)

Vanilla Cream Glaze

  • 1 cup (120g) powdered sugar

  • 1.5–2 tbsp heavy cream or half-and-half

  • ½ tsp vanilla extract

  • Pinch of salt (optional)


๐Ÿž Instructions

1. Mix & Autolyse (Evening, Day 1)

  1. In a large bowl, mix:

    • 500g flour

    • 200g water

    • 50g heavy cream or half-and-half

  2. Stir just until no dry flour remains.

  3. Cover and rest for 30–60 minutes.


2. Enrich the Dough

  1. Add 100g active starter and 50g brown sugar. Mix thoroughly.

  2. Add 1 large egg and 8g salt. Mix again.

  3. Add softened butter in pieces. Knead until fully incorporated and dough is smooth (10–15 min by hand or 5–7 min in stand mixer).

Note: Brown sugar adds moisture and a richer flavor to the dough. It may make the dough slightly tackier than using granulated sugar — this is normal and makes for a softer crumb. Avoid adding too much extra flour.


3. Bulk Fermentation

  1. Cover the dough and ferment for 4–5 hours at room temp (72–75°F / 22–24°C).

  2. Do 3–4 sets of stretch and folds during the first 2 hours.

  3. Dough should be airy and about 50–75% risen.


4. Cold Fermentation

  1. Shape dough into a ball, cover, and place in the fridge overnight (8–14 hours).


5. Shape the Rolls (Morning, Day 2)

  1. Bring dough to room temp (~1 hr).

  2. Roll into a 14"x18" rectangle on a lightly floured surface.

  3. Spread with 60g soft butter.

  4. Mix and sprinkle over:

    • 100g brown sugar

    • 2 tbsp cinnamon

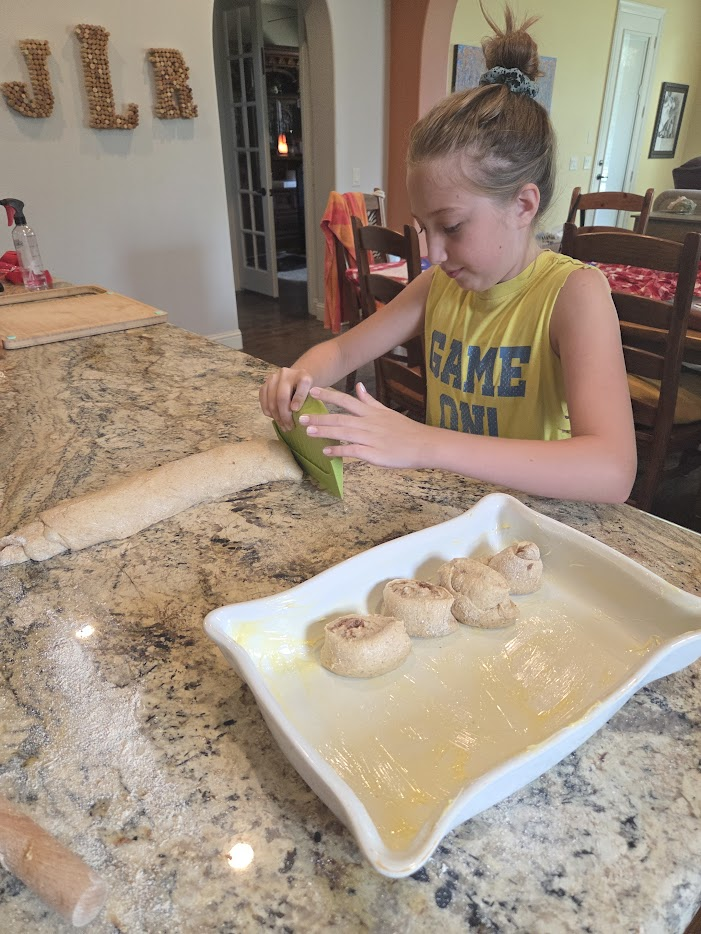
  5. Roll tightly from the long edge. Slice into 8–12 even rolls.


6. Final Proof

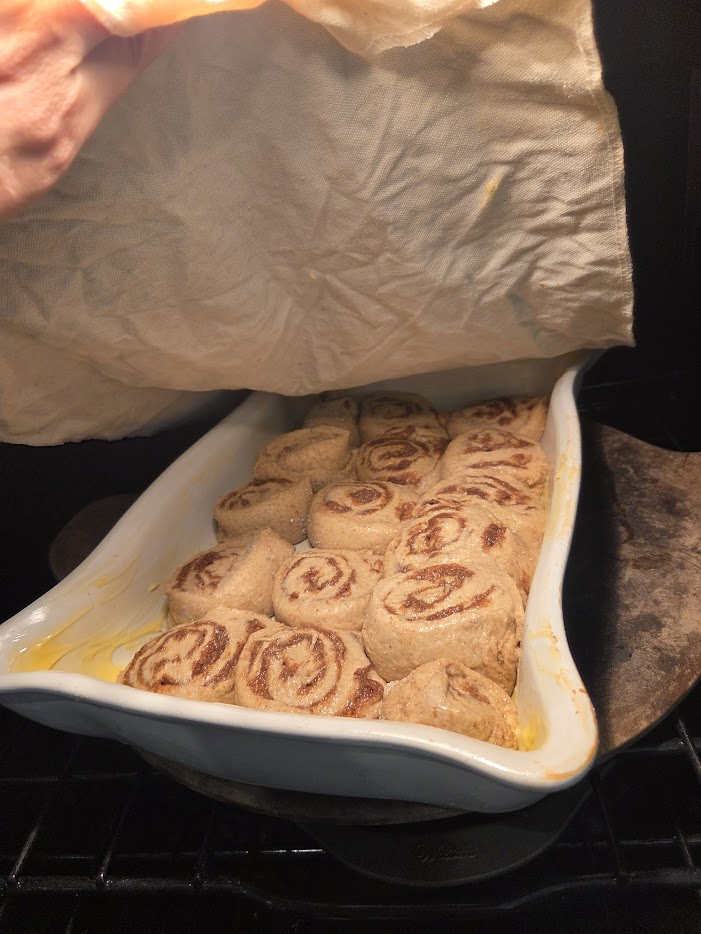
  1. Place rolls in a buttered 9x13" pan or cast iron skillet.

  2. Cover and proof at room temp for 2–4 hours, or until puffy and slightly jiggly.


7. Bake

  1. Preheat oven to 375°F / 190°C.

  2. Bake rolls for 22–28 minutes, or until golden brown and internal temp hits ~195°F / 90°C.

  3. Cool slightly before glazing.


8. Make the Glaze

  1. In a bowl, whisk:

    • 1 cup powdered sugar

    • 1.5–2 tbsp heavy cream or half-and-half

    • ½ tsp vanilla extract

    • Pinch of salt (optional)

  2. Adjust thickness by adding more cream (for drizzle) or sugar (for spreadable icing).

  3. Pour over warm rolls and serve.


๐Ÿ” Make-Ahead Tips

  • Refrigerate after shaping: Shape the rolls, cover, and refrigerate overnight. Bake straight from cold, adding 5–10 minutes to bake time.

  • Freezer-friendly: Freeze baked rolls (unglazed), then reheat and glaze fresh.


๐Ÿ’ฌ Final Thoughts

These cinnamon rolls deliver that perfectly chewy-yet-soft texture with a deep molasses warmth from the all-brown sugar dough and filling. The natural fermentation adds complexity, and the heavy cream vanilla glaze takes them over the top. No shortcuts — just real, rich flavor.


Authentic Cacio e Pepe (With Easy American Grocery Substitutions)

Prep time: 10 minutes | Cook time: 10 minutes | Servings: 2 Cacio e Pepe, literally "Cheese and Pepper", is one of Rome's most...